I'm pleased to announce the availability of my Gecko Hat and Headband pattern for only $3:
Showing posts with label knitting. Show all posts
Tuesday, July 19, 2011
Thursday, July 14, 2011
binding off
Here's a way to bind off stitches that really helps your bind off stay loose. I "unvented" it while working through Lynne Barr's mind-opening Reversible Knitting. Captions are beneath the photos.
This method helps keep the first stitch open. If you want extra insurance, you can hold it open with your thumb. I would use my left thumb to hold it open from the time I put it back onto the needle to the time I pulled the loop through both stitches.
Several stitch patterns in Reversible Knitting call for passing slipped or worked stitches over other stitches. I find this method saves time, but I don't assume that would be the case for everyone. I just fling the stitch back onto the needle when I'm going in for my next stitch. Slick, if I do say so myself.
Tuesday, July 12, 2011
leftward leanings
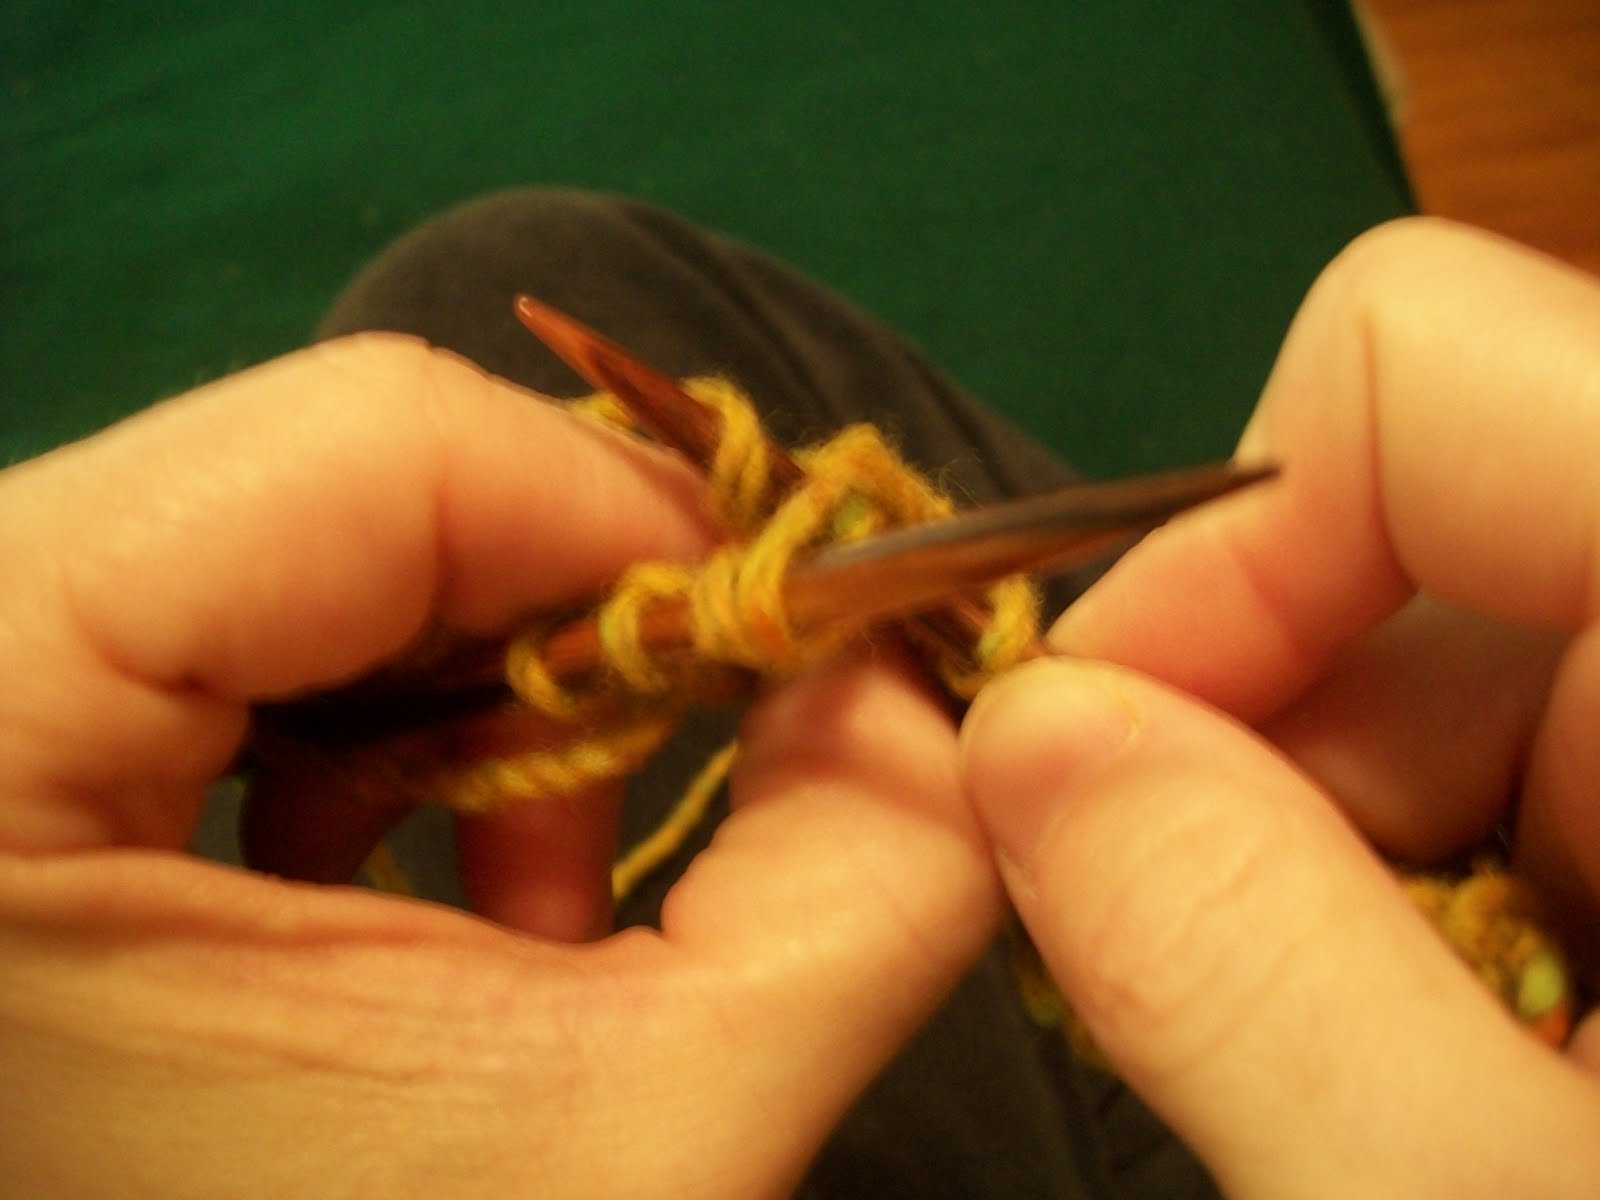
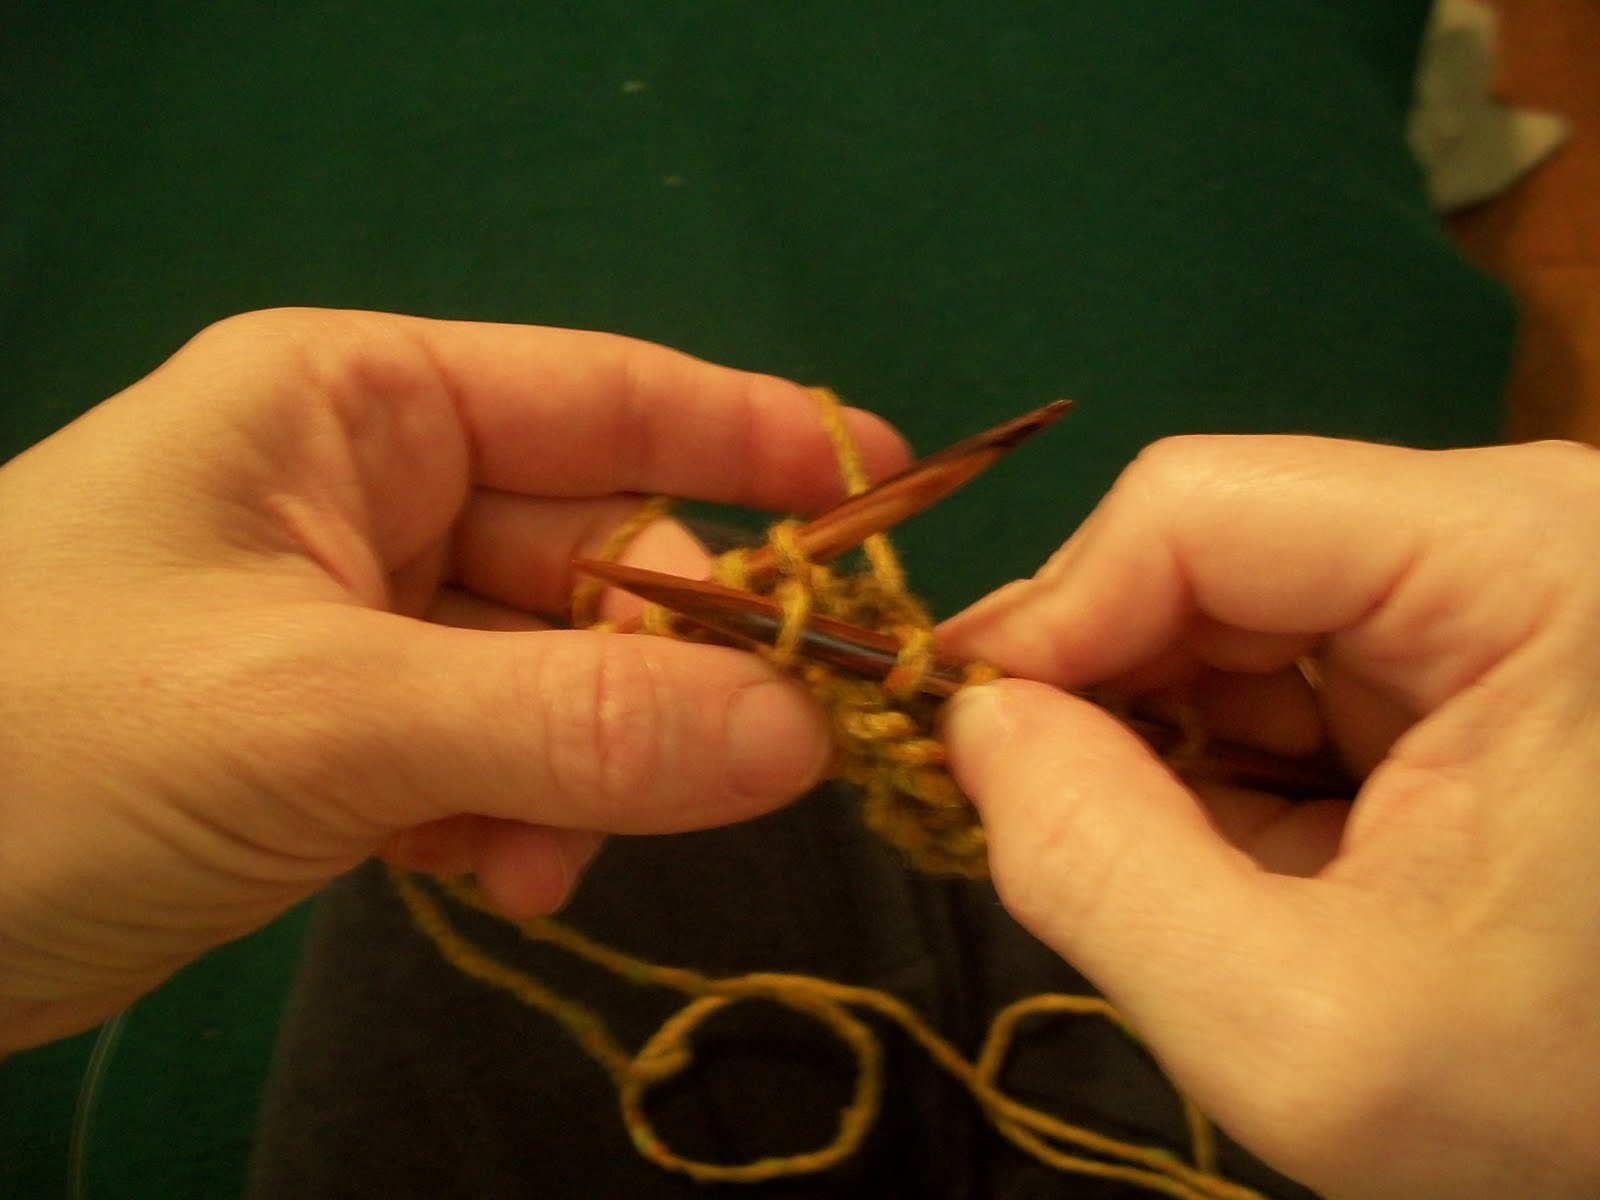
If you knit, you may already know about the SSK decrease, which is in my opinion the best looking left-leaning decrease. It involves slipping two stitches knitwise, one at a time, and then knitting these slipped stitches through the back loops.
You can also work this decrease without taking the stitches off the first needle. It especially works well with wooden or bamboo needles, but metal works, too.
Here's how to do it (captions are below the photos they reference):
Insert the needle knitwise into the first stitch, but do not take it off.
Tuesday, March 15, 2011
faux bow baby hat
Tuesday, March 8, 2011
Tuesday, February 22, 2011
Great Barrier Reef
I have been wanting to knit something from Knits from Nature by Jenny Kee since my friend Joan gave me the book about 10 years ago. I love wearing tunics, but the one I really want for myself is the Barramundi, and I haven't had money for yarn since . . . well, since ever! But when baby Caleb needed a blanket I knew just where to look for inspiration. Since the blanket is worked in intarsia, the back side is, shall we say, not nearly as attractive. But I could use left over scraps of yarn for it, and I think it turned out really well.
Tuesday, November 30, 2010
tiger shawl
Sunday, October 24, 2010
Cole's socks
The swirls go opposite directions on the two socks.
Wednesday, October 20, 2010
Butterfly
Can you see the butterflies?
Labels:
estonian lace,
kitty-kitty shawl,
knitivity,
knitting
Tuesday, October 5, 2010
Posie-Head Rosie hat
Yarn: 2 balls Rowan Big Wool (super-bulky)
odd bits of at least one other color of similar weight yarn
Needles: US Size #10 circular and double pointed
Gauge: 13 sts and 18 rows = 4"
Cast on 60 sts using circular needle and main color. Join, being careful not to twist.
*K1, P1* around. Continue in knit until work measures 6" from cast on edge.
First increase round: *K1, inc 1 st, K8, inc 1 st, K1*, repeat between *s until end of round, 72 sts.
Knit 3 rounds.
Second inc round: *K2, inc 1 st, K8, inc 1 st, K2*, repeat between *s until end of round, 84 sts.
Knit 3 rounds.
Third inc round: *K3, inc 1 st, K8, inc 1 st, K3*, repeat between *s until end of round, 96 sts.
Knit until work measures 9" from cast on edge.
Purl one round (turning row).
Knit one round.
Shape top (switch to dpn or magic loop when round gets tighter):
First decrease round: *K1, SSK, K10, K2tog, K1*, repeat between *s until end of round, 84 sts.
Knit 3 rounds.
Second decrease round: *K1, SSK, K8, K2tog, K1*, repeat between *s until end of round, 72 sts.
Knit 3 rounds.
Third decrease round: *K1, SSK, K6, K2tog, K1*, repeat between *s until end of round, 60 sts.
Knit 3 rounds.
Fourth decrease round: *K1, SSK, K4, K2tog, K1*, repeat between *s until end of round, 48 sts.
Knit 3 rounds.
Fifth decrease round: *K1, SSK, K2, K2tog, K1*, repeat between *s until end of round, 36 sts.
Knit 3 rounds.
Sixth decrease round: *K1, SSK, K2tog, K1*, repeat between *s until end of round, 24 sts.
Seventh decrease: K1, then *K2tog* until 6 sts remain.
Break yarn. Thread yarn through tapestry needle and weave through remaining stitches. Pull tight.
Posie:
Cast on 2 sts with contrasting yarn. Work flat in garter stitch (knit every row), increasing one stitch at the beginning of each row until there are 11 stitches. Make 4 points.
With main color, knit across all 4 points, and join into a circle, 44 sts.
With new color (if desired), K2tog around for 3 rounds, ending K1.
Pass 5 sts over first stitch. Fasten off. Weave in loose ends. Use main color to sew posie to hat through center.
Work blanket stitch around purl stitch round of hat in a contrasting color. Weave in loose ends. Hand wash and let dry.
Tuesday, September 28, 2010
frog buttons
The next step is to make a frog with a button end. Nicky suggests a "single knot," but my single knot did not look anything like the photo, went through the frog loop too easily, and was not attractive. In the end, I chose a ball knot from these instructions, but I seriously considered using a square knot.
The square knot almost worked, and I think it would have been a good choice with thicker cord or a smaller loop. I use the "frog on a log" method of tying a square knot. I will show it here in case you don't know it.
Frog on a log . . .
Frog on a log (again) . . .
. . . and the log rolls over.
Now fold the end back around and under the frog counter-clockwise to re-make the first loop. Pin through the middle of the frog. It should look like this. (Pay no attention to the odd bits of cord at the right of the photo.)
Bring the end down and around clockwise to make the loop with the button on it. Adjust the placement of the button by tightening and loosening the knot until it's right where you want it. Unravel any extra cord from the live stitches at the end (beginning). Thread the unraveled yarn through the live stitches. Secure the loop by sewing both ends together behind the frog.
I used the cast-on tail to secure each corner of the frog to the garment. Since this garment had a folded hem, I simply tied the tails (from cast-on and bind-off) in a square knot on the wrong side, and hid each end of the knot in the hem. (If you don't know how to do this, let me know, and I'll show you!)
Monday, September 27, 2010
frog closure tutorial
I thought it would be fun.
I chose the "Basketweave Knots" from Nicky Epstein's Knitted Embellishments because they looked compact and the shape echoed those found in the intarsia design of the garment. I read the instructions, which said to leave the end on a stitch holder instead of binding off, and to "Form the frogs by using T-pins to anchor (beginning with the cast-on edge) against a piece of Styrofoam board." There was also a drawing with arrows showing the direction the cord should travel, and places marked "begin" and "end." It all seemed very clear.
I made a piece of cord, keeping the end of it on the needle. My plan was to make a frog, then untie it and measure the length I would need. But I first had to figure out the drawing. The frog was drawn completed, so the cord was going under some spots and coming back out . . . where? Maybe it's because I'm brain damaged, but it took me a while to work it out at first. And then again when I came back to it after packing my family off to the library. And then again after I had made all my cord and wanted to turn it into frogs. And then again . . .
I thought this would be fun.
So. I got the drawing figured out. I had a piece of Styrofoam board my husband had been saving for just this occasion (not likely) and T-pins. But it wasn't clear how to use the pins to anchor the cord. It seemed like I would have to constantly move the pins in order to make the knot, yet every time I moved them I lost the last three steps. Plus, I was trying to do this on the floor, and my back hurt.
Wasn't this supposed to be fun?
Having developed a good way to make these frogs, I thought I would share it with you. This method can probably be adapted to most of the frog closures in the book--but if you want to make the "Leaf Frog", you're on your own.
I calculated I would need a 10" piece of cord (using Lily Chin's Gramercy in color 15) for frogs and 12" for buttons. Here I have the cord with live stitches on the end waiting to be knotted. Since I needed 10 to 12 of these things (for 5 or 6 pairs of frogs and buttons), I didn't use stitch holders. I bound off and undid the bind-off. I could have just cut the yarn, taken a needle, and threaded it through the stitches.
Here I have the first two pins in the cord. If you look closely, you will see that I did not start with the cast-on end. Those are live stitches. Also, if you compare this to the drawing in the book, you will see that I did not pin the start point, but left it free. It is dangling off to the right of the picture and should be doubled back, under the rightmost T-pin.
And over loop 3, and down through loop 2.
Tighten by gently tugging both ends and easing the loops.
Note that some of the pictures show a very loose knotting. This is just for clarity. The fourth picture shows the approximate tightness of the finished frog.
I hope that was helpful! Next up: corresponding buttons.
Monday, March 29, 2010
Nana's Vest
The front is done. This is Susan Duckworth's Venetian Tiles Cardigan with some modifications. I did the ribbing in intarsia instead of all one color, I made each set of tiles different (there were four varieties), and I did the shoulder shaping with short rows instead of binding off. Also, I changed the upper row of tiles to a row of three instead of four because I plan to make this a V-neck vest, and that will match the adaption to the fronts.
She didn't choose this pattern or the colors, so I'm hoping she likes it.
Thursday, June 18, 2009
since the stroke
The yarn is Lisa Souza's laceweight merino. Not a single knot in 2520 yards. I ended up not using the center pull because the yarn is so soft it knots and pills. I am very happy pulling from the outside of the ball! The color is so pretty everyone remarks on it.
It's much more subtle knit up.
On to my other obligations (see post from March 16).
Monday, March 16, 2009
Friday, March 13, 2009
Aspidistra
I finished it. Just think--the outer border alone has over 4,000 stitches in it. Crazy. But Jeff asked for it, and I can't resist a knitting request. This is shown on our queen-sized bed. It's about 6 ft by 6 ft. It's soaking now, then I'm going to block it* and when it's dry it will cover an acoustic flaw in our living room.
*block: kneel on the floor for hours, stretching and pinning and measuring and wishing it wasn't allergy season
I estimated it would take around 4 balls of Noro Kureyon Sock color 219, so I bought 7 (just in case). After I started the center I decided it would look better starting at another color in the series, so I made the first try into a hat for Gwendolyn instead of ripping it all out. The hat is really cute, but I've been ambivalent all along about Aspidistra herself. Everyone who sees her thinks she's beautiful. Jeff has been consistently positive, and it's for him, so I knit on, but it's really hard to put that much work into something you're not sure will be wonderful. I asked myself what in the world I would do with all that extra yarn, and started fantasizing about crazy multicolored lace trim to go on a dress for G. I even mentally designed a pair of knee highs for myself. I began to like the idea of extra yarn even more than the idea of this big . . . thing.
This is all that's left. I'm going to darn some store-bought socks with them and I still might have enough left over for the lace trim on that dress.
Subscribe to:
Posts (Atom)